
RV water systems have come a long way in terms of quality and reliability. Many RVs now even include built-in water softener and filter systems. However, if you currently own an RV that doesn’t have a pre-installed system, you can always add one after the fact.
You can put water softeners in RV’s, and it is one of the smartest camping decisions that you can make. Water softeners help purify and soften campground water by removing unwanted minerals. You can even install a water softener in an RV by yourself without plumbing assistance or experience.
In this article, we’ll look at everything there is to know about RV water softener and filter systems. We’ll walk you through the installation process from start to finish, as well as details about maintaining your system.
Table of Contents
Can you put a water softener in an RV?
Not only can you put a water softener in an RV, you probably should. Campground water is notorious for its high mineral deposits and bacteria. A softener will prevent water from discoloring the sinks, toilets, and showers inside your RV. It will also make your water more potable if you want to drink it from the tap.
Most campers and RVs have limited interior space. While some newer models preinstall water softeners in their plumbing system, most of the time they must be added after the fact. In these cases, the water softener actually gets installed outside of the RV. This type of softener is great because it doesn’t take up any valuable interior space inside an already small RV.
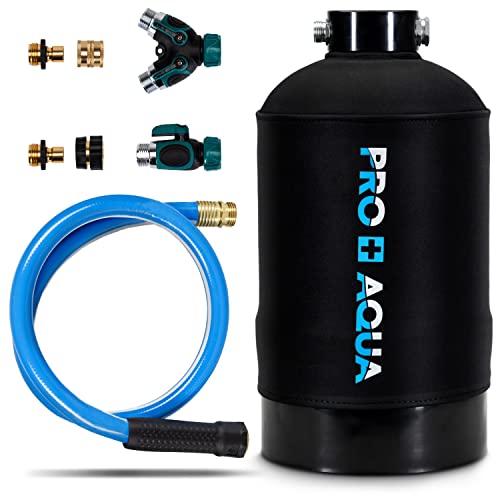
RV water softener and filter system
If you’re interested in installing an RV water softener and filter system, the process is quite simple. The first you’ll have to do is purchase an RV water softener at an RV superstore, or possibly at an outdoor store, such as Cabelas or Bass Pro Shops. Here are a few of the best options for a softener and filter system.
- 【 HIGHLY EFFICIENT 】Hard water is notorious for smelling like rotten...
- 【 READY TO USE IN 5 MINUTES 】This PRO+AQUA Portable Water Softener...
- 【 MULTI-PURPOSE & EFFECTIVE】Innovatively designed in the U.S., this...
- 【 NO ELECTRICITY REQUIRED 】Requires no tools or electricity. Easily...
- 【 VALUE FOR MONEY 】Despite its compact size of only 10" x 19.5", this...

- The Double Standard Softener & Conditioner produces twice the gallons...
- Built for the owner of any RV/Marine model, this 16,000 grain unit is a...
- Its compact, space-saver design allows it to be installed in the tightest...
- Its unique features includes easy to carry handle on top, large mouth...
- It utilizes a standard garden hose connection between park faucet and your...
Each of these softeners are high-quality and easy to install. My personal favorite, however, is the On the Go RV Water Softener, and it’s actually the one I have installed on my RV at the moment. When combined with the RV Mate Marine Water Filter, campground water becomes as soft as butter. Let’s look at the installation process.
- Your water filter or water softener should come with a short hose attachment. Attach this hose to the campgrounds water supply faucet.
- Attach the water filter to this hose. It’s important that you have your filter installed before the water gets to the softener. The filter will remove larger particles and debris that could possibly clog your softener.
- You have two options for connecting your water filter to your softener. The first option is to have another short hose between your filter and your softener. Your other option is to screw the filter directly onto the softener. The advantage of using this method is simply that there is one less hose for water to leak out of before it gets to the softener.
- After the water passes through the filter, it will then flow through the inlet end of the softener.
- Attach a garden hose from the outlet end of the softener to the city intake port on the side or back of your RV.
- Turn the campgrounds water supply to ON and let water start flowing through your softener/filter system and into your RV!
It’s important to note that the very first time you’re using your RV water softener, the process will be slightly different, but not by much. Hook your hoses and filters up the same way, but rather than running a hose from the softener to the RV, you should first let the softener flush for several minutes. Simply let water flow through the softener for two to three minutes before hooking the hose up to the RV.
How does an RV water softener work?
RV water softeners work very similarly to how a softener works in your house. It’s just on a smaller scale. The softener is positioned between the water source and the inlet port of your RV. There is a combination of salt and resin inside of the softener that attracts harmful chemicals such as calcium, magnesium, and iron.
The resin and salt intercept these products and replace them with sodium chloride. The result is that your water is cleaner and softer than it would otherwise be.
How long does an RV water softener last?
The lifespan of your RV water softener depends on its quality and how well you maintain it. RV water softeners can last anywhere between 5 and 15 years, as long as you maintain them and regenerate them as needed. In general, cheaper water softeners are lower quality and won’t last as long as more expensive softeners.
How do I regenerate my RV water softener?
Regenerating your RV water softener is a fairly simple process that will vary slightly depending on the brand of softener you have. However, here’s what the process usually looks like.
- Turn the water supply off and disconnect the inlet and outlet ends of the softener.
- Drain the water inside the softener by turning the softener upside down and letting water pour out of the inlet and outlet ends. Make sure that you leave the softener cap on, however, as you don’t want the resin to drain out.
- Put the softener right side up and remove the cap.
- Pour the specified amount and type of salt into the top of the softener depending on the type and size of your softener.
- Put the cap back on and reattach the hose to the inlet side of the softener.
- Let the water run through the softener very slowly for the specified amount of time so that it’s barely leaking out the outlet side.
- Turn the water on full-blast for the specified amount of time and let water fly out the outlet side.
- Use a test hardness strip to check the status of your water as it comes out of the outlet end of the softener.
- Regeneration is complete and you can reconnect the hose to your camper.
Frequently Asked Questions
How often should I regenerate my RV water softener?
You should regenerate your softener every 2-3 months or as needed. Some campgrounds have harder water than others and you may need to regenerate every month.
Should I dump the resin out of the softener?
You never ever ever want to dump the resin out of your softener. Resin looks like tiny beads and they’re expensive and difficult to replace.
Final Thoughts
Whether you’re a full-time RVer or just a part-timer, RV water softeners are a life-changer. They enhance the quality of your water and lengthen the lifespan of appliances such as washers, dishwashers, and even your plumbing fixtures. If you’re struggling with hard water or discolored water, you should definitely try out an RV water softener and filter system.

Nick Lopresti is the founder of YourH2Home and a home improvement expert. He has years of experience writing about various home improvement topics, mostly as it pertains to water systems.