
You’ve just bought a condensing tankless water heater and are starting to realize that it’s getting expensive.
Between the installation and the unit itself it can add up quick.
Then, on top of it you need a condensate neutralizing trap. The thought of spending more money on one has you thinking twice about your purchase.
Have no fear!
The tankless water heater is an awesome purchase you won’t regret. Not only that, but there is a very cheap solution to buying a condensate neutralizing trap.
You can easily and economically make your own condensate neutralizer trap!
Here is a very handy guide on how to DIY a capsule yourself to safely drain away your condensate from your tankless water heater.
Before I get into the instructions with a helpful video, let’s go over a few things you need to keep in mind before you make a homemade condensate neutralizer.


Table of Contents
Is A Condensate Neutralizer Necessary?
Yes, you definitely need to have a condensate neutralizer if you have a condensing tankless water heater for two possible reasons. One, your local ordinances may require it. Two, you’ll damage your drains as the condensate is highly acidic.
You may be tempted to just let it drain away, but you’ll end up spending more money in the long run by needing to replace your drains after a while.
And, your city may require a neutralizer so that their pipes don’t get damaged by your runoff.
If you haven’t bought your tankless water heater yet and wonder which kind you should get then head over to my article I wrote about the differences between condensing and non condensing. This will give you a better understanding of the kind you need.
How the Neutralizer Trap Works
As your acidic discharge enters the capsule, it encounters the media. Then the media, whichever one you choose, will turn change the pH of the water from acid to base, thus neutralizing it. It’s the calcium carbonate present in those stones is what changes the acidity.
What Kind of Material Does the Trap Need?
Either marble or limestone work just fine with a couple of caveats. You can use the same crushed limestone that you see on some driveways, or marble for landscaping, but the calcium carbonate content varies so there is no way to have an accurate idea of how well they will work.
Plus, larger chips are not as effective in general.
The key is to look for small chips. Larger chips won’t give you as much fill in the capsule and will instead have air pockets. The smaller chips will fill the container more fully.
I recommend going to Amazon to pick these up so you can avoid having to buy a gigantic bag from your local big box store.
Having a pelletized lime type material is the way to go in my opinion.
There is a special type from Saniflo that allows the drainage to pass through easier since they are shaped like little balls. The shape also makes it easier to fill your trap, and the amount of calcium carbonate is higher than limestone chips.

How Often Should You Change The Condensate Neutralizer?
You should plan on changing your filler for the condensate capsule at least once per year.
I wouldn’t have that set in stone however. Especially since many condensing tankless water heaters can really concentrate the amount of corrosive acids that accumulate like nitric, nitrous, sulfuric, and sulfurous and hydrochloric acids.
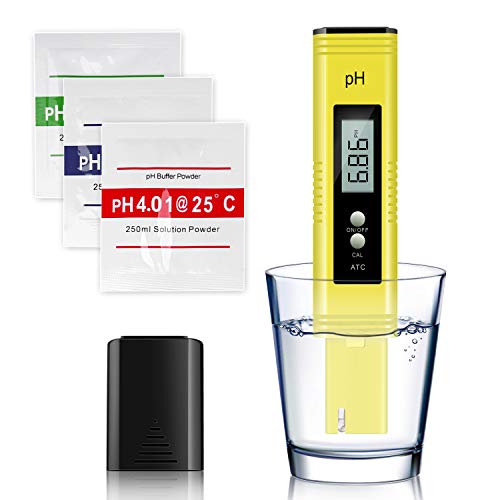
I recommend testing the runoff periodically with a pH tester to see what the levels are as it runs off into the drain.
Using a pH reader like this one from Vantakool, you can make sure that the water has been neutralized.
- ✔ wide use: Pocket Size PH Meter is the ideal test kit for home and...
- ✔ Fast Accurate: Ensure your pool, general hydroponics ph. or even...
- ✔ automatic temperature compensation: No more need to take care about the...
- ✔ Auto Calibration: The Eternal Be PH meter has an auto temperature...
- ✔ Package Included: Come up with 1x Eternal Be PH meter, 1x user manual,...
What should the pH be when it goes into the drain?
Look for a pH of over 5. 5 or 6 is about the same pH as rain water and won’t do any damage. Even a pH as high as 4 can be corrosive to your pipes. If you test and it is under 5 then I would change out that filler before it gets very corrosive.
Basically, you should add changing your filler for the trap part of your general tankless water heater maintenance schedule. If you want to know more about descaling a tankless water heater then follow that link to a detailed article I wrote about everything you need to know about how to maintain yours.
Wondering if drinking condensate from your air conditioner is safe for humans or pets? Check out this article to find out.
How to Make a Condensate Neutralizer Box
If you want to save some money, it is actually very easy to make your own condensate neutralizer box.
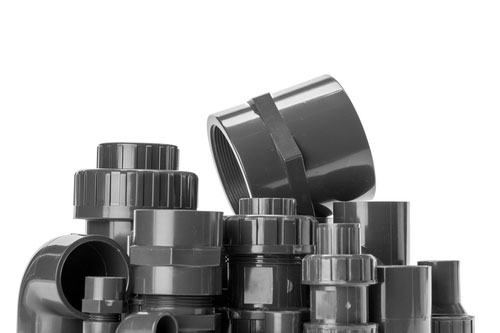
With some PVC, a 5 gallon painter’s bucket and some limestone or marble chips, you can do a really easy DIY version.
Here are the materials you’ll need:
- 5 gallon painter’s bucket with lid (or a 15 to 20 inch long PVC pipe with end caps)
- 2 nylon hose barbs – ½ inch width male
- Liquid cement
- 1 bag of marble or limestone chips
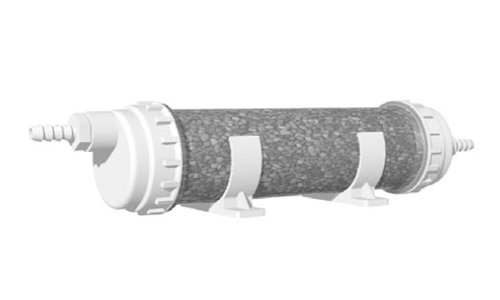
Step By Step Guide to DIY Condensate Box or Capsule
Time needed: 1 hour.
DIY Condensate Neutralizer
- Make a Plan
Whether you are going to use a bucket or a PVC pipe figure out where you will be adding the connectors for the pipe to attach.
If you use a PVC pipe, make sure it is a 4” and is at least 15 inches long. You’ll want to make sure that the entrance hole is higher than the exit so it drains properly. - Drill the Holes
Assuming you are using ½ inch hose barbs, then you will need a 23/32 taper drill bit to make your holes.
Just make your holes in the spot where you need the water to enter and exit the box. - Get Some Glue
Have your liquid cement ready and use the wand to apply the glue around the holes. Then add a bit to the hose barbs themselves.
Snugly attach the barbs to the pipe or bucket lid and bucket. - Fill with Media
If you are using a PVC pipe then fill it with the chips. Either limestone or marble as they will neutralize the condensate. How much you need depends on how big the space is. If you are using a bucket you only need to fill it a few inches deep. A pipe should be totally filled.
- Seal it Up
Now just close the PVC pipe with the caps or put the lid on the bucket. Don’t seal these with cement as you will need to open them to refill.
- Check the pH
How often do you need to change the condensate neutralizer? You should check once a year what the pH is. A good indicator is between 6 and 8, so if it goes lower than 5 you will need to refill the condensate material.

Take a look at this video to learn how to make a condensate neutralizer capsule.
Final Thoughts
I have to admit I am not the most handy guy out there and yet, I feel like building my own DIY condensate neutralizer capsule is not at all difficult. Just about anybody can do it.
Is it worth it to build your own?
If you love the idea of saving money by making your own solutions to problems then I think it’s definitely worth it.
If you are busy, like I am, then buying one already made may be the way to go since your time is also money.
Check out these ones from Amazon that you can buy set up and ready to go.


Otherwise, take some satisfaction in knowing you are self sufficient and keep some more of your hard earned money in your pocket.

Nick Lopresti is the founder of YourH2Home and a home improvement expert. He has years of experience writing about various home improvement topics, mostly as it pertains to water systems.